How to Remove and Replace Old Underlay: A Step-by-Step Guide
Quick Links
Step-by-Step Guide to Removing Old Underlay
Step-by-Step Guide to Installing New Underlay
Upgrading your flooring can significantly enhance the aesthetic and functional quality of your home. However, one crucial step that often gets overlooked in this process is the underlay. The underlay plays a vital role in providing cushioning, insulation, and soundproofing for your floors. Over time, underlay can become worn out, lose its effectiveness, and need replacement. In this comprehensive guide, we’ll walk you through the process of removing and replacing old underlay in a straightforward and effective manner.
Before diving into the how-to, let’s discuss why it’s essential to replace your underlay:
- Wear and Tear: Over time, underlay can deteriorate, becoming less effective in providing comfort and support.
- Hygiene: Old underlay can accumulate dust, allergens, and even mold, impacting indoor air quality.
- Improved Performance: Newer underlay materials often offer better insulation, soundproofing, and durability.
Tools and Materials Needed
Before starting, gather the necessary tools and materials:
- Utility knife or carpet cutter
- Pry bar or flooring puller
- Staple remover or pliers
- Broom and dustpan
- Vacuum cleaner
- Measuring tape
- New underlay
- Adhesive tape or staples
- Safety gear (gloves, mask, knee pads)
Step-by-Step Guide to Removing Old Underlay
Step 1: Prepare the Area
Clear the room of all furniture and obstacles. This will give you ample space to work and prevent any accidents or damage to your belongings.
Step 2: Remove the Flooring
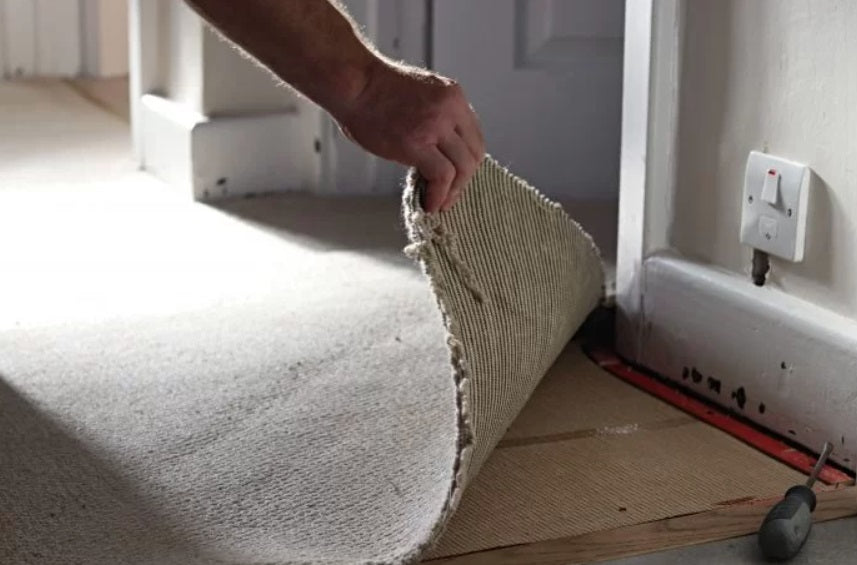
If you have carpets, start by pulling up the carpet from one corner using pliers. Carefully roll it back and remove it from the room. For hardwood or laminate floors, you might need to remove skirting boards first. Use a pry bar to gently lift the boards without damaging them.
Step 3: Inspect and Remove the Old Underlay
Once the flooring is removed, inspect the underlay. If it’s stapled down, use a staple remover or pliers to pull out the staples. If it’s glued down, use a utility knife to cut it into manageable sections, then pull it up. Be cautious of any sharp objects or nails that may be present.
Step 4: Clean the Subfloor
After removing the old underlay, thoroughly clean the subfloor. Sweep up any debris and vacuum the area to ensure it’s free of dust and dirt. A clean subfloor is crucial for the new underlay to adhere properly and perform effectively.
Step-by-Step Guide to Installing New Underlay
Step 1: Measure the Room
Accurately measure the dimensions of the room to determine the amount of new underlay required. Add a few extra inches to your measurements to account for any errors or adjustments.
Step 2: Cut the New Underlay
oll out the new underlay and cut it to fit the room's dimensions using a utility knife. Make sure the pieces fit snugly together without overlapping, as this can create uneven flooring.
Step 3: Lay the Underlay
Start laying the underlay in one corner of the room, ensuring it aligns with the edges. Unroll the underlay, making sure it lies flat against the subfloor. If the underlay has a built-in adhesive strip, peel off the backing and press it down firmly. If not, use adhesive tape or staples to secure it in place.
Step 4: Secure the Seams
Where two pieces of underlay meet, use adhesive tape to secure the seams. This will prevent the underlay from shifting and ensure a smooth surface for your flooring.
Step 5: Trim Excess Underlay
Once the underlay is laid out and secured, trim any excess material around the edges using a utility knife. Make sure the underlay fits perfectly within the room's dimensions.
Step 6: Install the New Flooring
With the underlay in place, you can now proceed to install your new flooring. Follow the manufacturer’s instructions for the specific type of flooring you’re using, whether it’s carpet, hardwood, laminate, or vinyl.
Tips for a Successful Underlay Replacement
- Choose the Right Underlay: Different flooring types require different underlays. For example, carpet underlay is typically thicker for added comfort, while laminate underlay is designed for moisture resistance.
- Work in Sections: If you’re working in a large room, it might be easier to lay the underlay in sections. This approach helps maintain control and accuracy.
- Check for Moisture: Ensure the subfloor is dry before laying down the new underlay. Moisture can cause mold and damage the underlay and flooring.
- Wear Safety Gear: Protect yourself by wearing gloves, a mask, and knee pads. This not only ensures your safety but also makes the process more comfortable.
Common Mistakes to Avoid
- Rushing the Job: Take your time to ensure each step is done correctly. Rushing can lead to mistakes and subpar results.
- Not Cleaning the Subfloor: Any debris left on the subfloor can create bumps and uneven spots in the new underlay.
- Improper Measuring: Incorrect measurements can lead to waste or the need for additional cuts, complicating the process.
- Skipping the Seams: Failing to secure the seams can result in the underlay shifting, which can affect the flooring above.
Conclusion
Replacing old underlay is a crucial step in maintaining and improving the quality of your flooring. By following this step-by-step guide, you can ensure a smooth and successful underlay replacement process. Not only will this enhance the comfort and durability of your floors, but it will also contribute to a healthier and more enjoyable living environment. Whether you’re a DIY enthusiast or a first-time renovator, these detailed instructions and tips will help you achieve professional


